How To Make a Fairytale-Worthy Cloak
- Hannah Mason
- Nov 27, 2021
- 7 min read
Updated: Jan 3, 2022

Do you want to make a cloak that is worthy of every fairytale or fairytale retelling you have ever read? Have you always dreamed of being a princess or kick-butt medieval warrior and you knew you just needed the right garment for your wardrobe to make your dreams come true?
Well, today I have the tools to equip you to make those dreams come true!
For months, I have been seeing DIY cloaks, capes and other medieval coats come across my Pinterest home page and each time I saw them, my eyes lit up. They were exactly the kind of garment my characters would wear and there was a part of me that wanted to have one too. But I feared I didn't have the talent to make one myself.
When Halloween came around, I decided I wanted to be Red Riding Hood and thought I would give the cloak a try after all. But for the life of me, I couldn't find a pattern to buy that had everything I wanted: pockets, slits, and a hood.
I did find a few cloaks on Amazon that looked similar to the kind of cloak I was looking to make. One cloak by COOFANDY doesn't have the slits I was hoping for but was in my price range. This hood by ZJRXM is the exact piece that inspired the hood for the Once Upon a Tome Red Riding Hood but it doesn't have the slits or pockets I was hoping to have for Halloween.
Since I couldn't find exactly what I wanted, I decided to make it myself and, eventually found this DIY tutorial for a cloak by Sew Scoundrel. The tutorial and pattern did not have a hood but I planned to attach one using a secondary tutorial for attaching a hood. In the end, I put a collar on the cloak instead of a hood.
Sew Scoundrel's tutorial was reasonably easy to follow. I first put the pattern together by using a large roll of paper and drawing out the shapes with the measurements she includes on her post.
There are a few measurements she doesn't include. I struggled with the length of the pocket. My pockets ended up way too small because I cut them too short. I would recommend going for longer pockets rather than shorter ones. Worst case scenario, the pocket doesn't quite fit in your cloak. So long as you avoid sewing over the edge of it, though, this won't be too much of a problem (though it might be a tiny bit visible. The second thing I struggled with was the curve of the cloak. As you can see in the photo, the curve is meant to be 4 inches long but the arrow indicating the height of the curve doesn't actually have a measurement on it. I had to make it up as I went along. Luckily, it worked out for me. Just do your best to create a smooth curve.

The other thing I would HIGHLY suggest when creating your pattern is adding a "facing" to the bottom of the cloak. Watch the tutorial on Sew Scoundrel's site to see how a facing works but essentially, the facing makes it so the lining is not visible from the front. I was using a soft black, blanket material and by the end, it stuck out the bottom and was highly visible and terrible looking. If I had added a facing in the beginning, it would have saved a lot of time and trouble in the end.
So you have your pattern. What's next?
You're going to need your materials. I used quite a few different supplies in the making of my cloak because, again, I messed up and didn't know to add a facing on the bottom of my cloak.
Items You'll Need:
Fabric for the cloak: This is the fabric you want to show. I wanted mine to be largely red since I was going for a Red Riding Hood look but you could do any color. My fabric is a flannel because I wanted something that would be warm as well as look good. If I was going to spend money and time on this project, it was going to have use beyond Halloween! Sew Scoundrel suggests you will need 3.2 yards of fabric. I bought 3.5 yards and used less than 3 despite making a number of errors that wasted fabric. I did make my cloak slightly shorter than hers and took it in at the back.
Lining Fabric: I wanted something nice for this but I am also a cheapskate and didn't want to pay big-bucks for the nice fabric you can get at Joanns or other craft stores. Luckily, I found a piece of black blanket fabric that was 50% off because it was the end of the roll. Unfortunately, there was less than a yard of it! I had to work super carefully with it. I suggest buying 1-1.5 yards or more (Sew Scoundrel suggests 1.6-2.2 yards) and working with an easier fabric than blanket-fabric unless you're an expert sewer. I am not. It was HARD.
Thread: This was a big project and it used a huge amount of thread. And not just because I made plenty of mistakes and had to keep seam-picking my work and re-sewing it. Make sure you have plenty of thread in the right color before pressing ahead.
Buckles: I bought a couple of super cute leather buckles at Hobby Lobby. Sew Scoundrel pulled hers off an old piece of clothing. You could go without the buckles but I found that they really completed the cloak. A set of 10 sew-on buckles like these on amazon might be an even easier way to go if you sew often. This should be the very last step and make sure you sew them on straight (mine are a tiny bit slanted and I may go in later and fix that!)
Trim: This is absolutely an optional step. It isn't a step in the tutorial I was following but is a step I had to make up on my own when the lining of my cloak was visible at the bottom. I decided it would be best to add some trim to give the cloak more length and hide the lining better. I, unfortunately, measured the bottom of the cloak wrong at first and had to get trim twice before I finally was able to complete the cloak but this leather trim with metal eyeholes from Hobby Lobby did the trick.
Don't forget to make sure you also have the tools you need for your project. You won't want to have all your fabric, trim, patterns, and thread laid out only to realize you don't have scissors. Or a sewing machine!
Tools You'll Need:
Scissors: Sewing scissors are really vital for any sewing project. Regular scissors really won't cut it (haha, get it!) when you are trying to evenly, carefully cut around a pattern you've created. However, if there is no other option, regular scissors could do the job. There is no way to do the project without scissors though.
Sewing Machine: I'm serious here. You may not be a fan of machines but I do not care. Your handheld needle is not going to make this cloak before next year. This cloak took me a couple of weeks to make with a sewing machine. It would take years to make without one.
Needle: Talking of needles, you will need one of those too. Unless you are an absolutely perfect sewer (which not many of us are) there are going to be mistakes in your cloak that will be most easily fixed with a needle and thread rather than with a sewing machine. I cannot tell you how many times I would sew a line and then go back to find there was one tiny spot that the sewing machine had fixed. For that, it is much easier to sew the hole shut with a needle and thread.
Pins: Just about any sewing project is made 10x easier when you are able to pin the fabric in place until you sew it shut. Don't forget the pins, they'll save your life.
Iron/Ironing Board: If you've never sewed before this may seem a little strange to you. What does an iron have to do with sewing? Actually, it's really important to iron open seams before other seams are sewed down. Irons are also incredibly useful for ironing fabric in place before you sew it, similar to pins (but in slightly different situations.
So how did my cloak turn out?
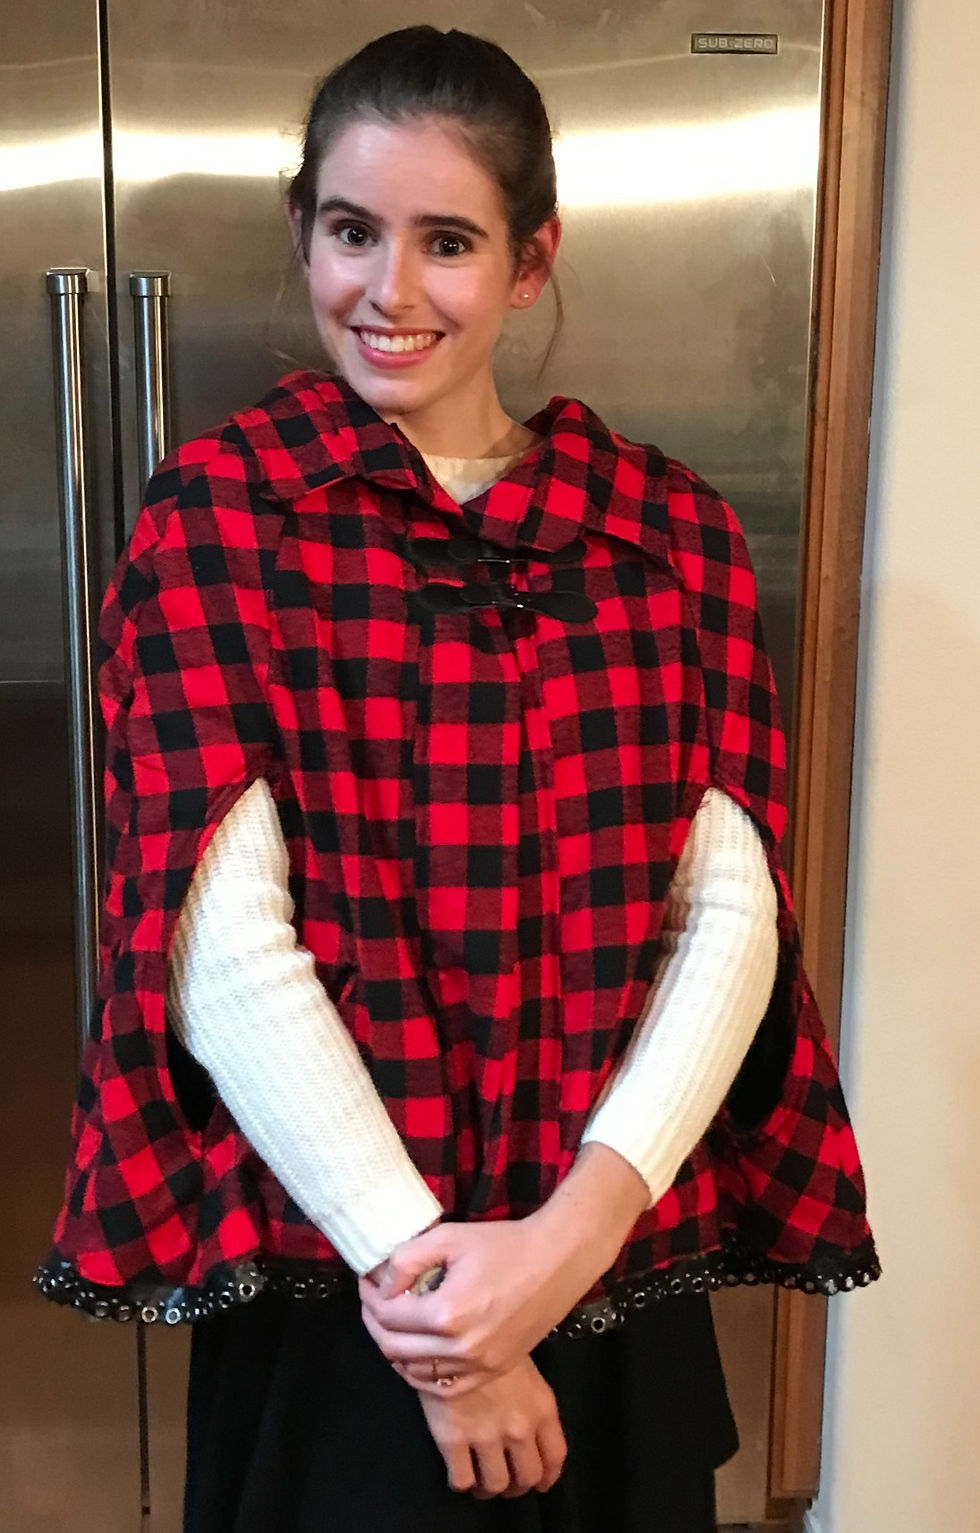
I'm pretty happy with it. The overall look of the cloak is good enough that I would be happy to wear it walking down the street on a shopping day with my sisters or girlfriends. I love the color, the cloak is incredibly warm and the arm slits are the perfect height and width. You can see me above dressed as Red Riding Hood (with a lot more makeup than I would usually wear) in the cloak and a sweater. I had to take the cloak off at this event because I was sweating. It was lovely and thick, held my keys in the pocket, and kept me good and warm when I walked from the car to the church.

I was pleasantly surprised by the arm slits (pictured above). These were something I had never sewed before and I felt the way Sew Scoundrel did the slits was ingenious. Though mine are much messier than hers the slits are incredibly clean and tidy.
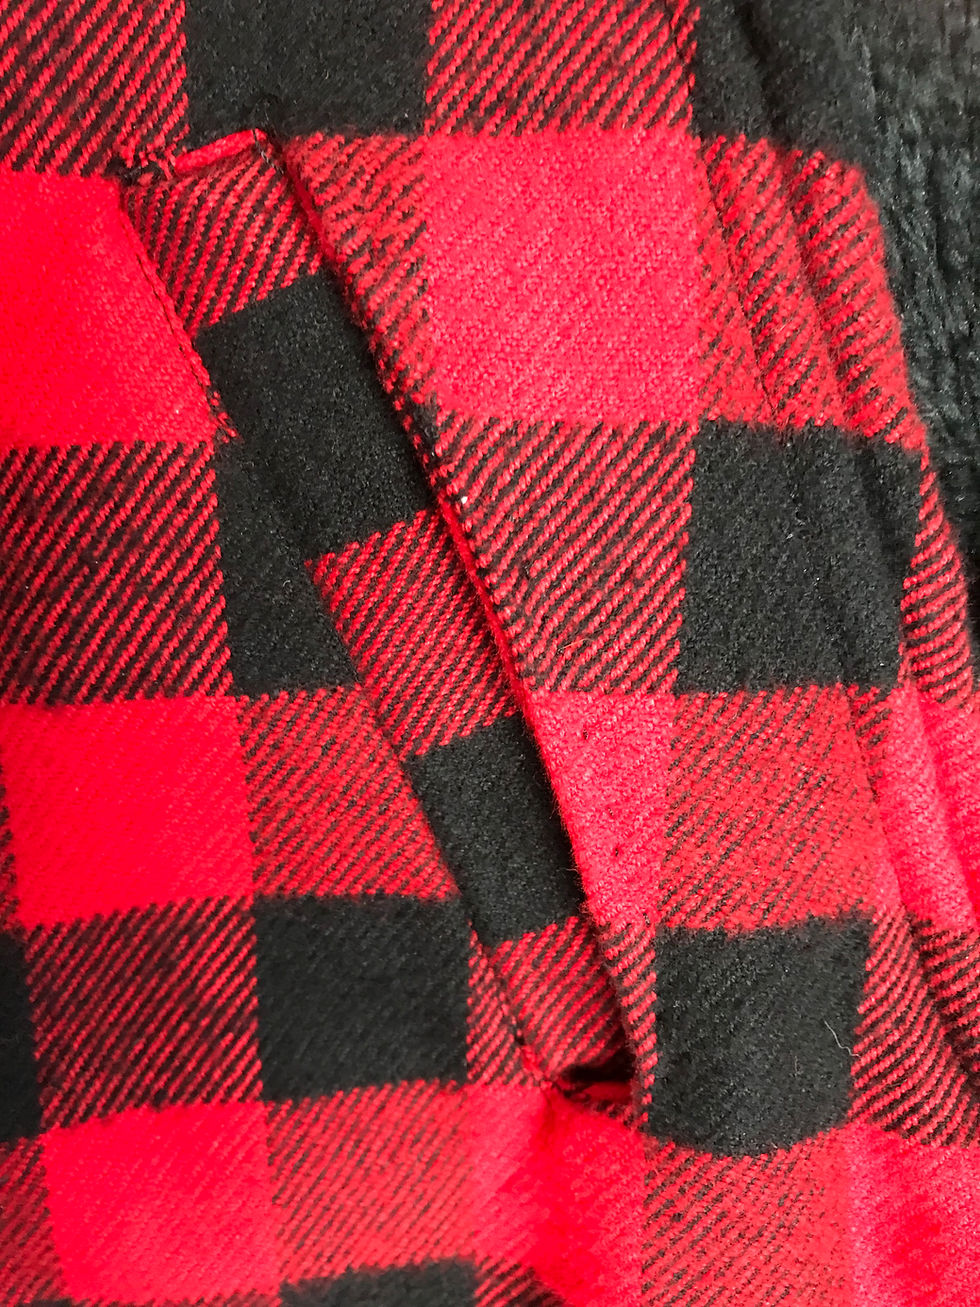
I also love the pockets. Though my pockets are too small to actually use, I can actually slip my hands between the outer fabric and the lining and I sewed extra lines of thread so I would be able to do this. The pockets themselves (called welt-pockets) are also super tidy and clean. I had never tried anything like this either and found them to be reasonably easy and really cool looking.
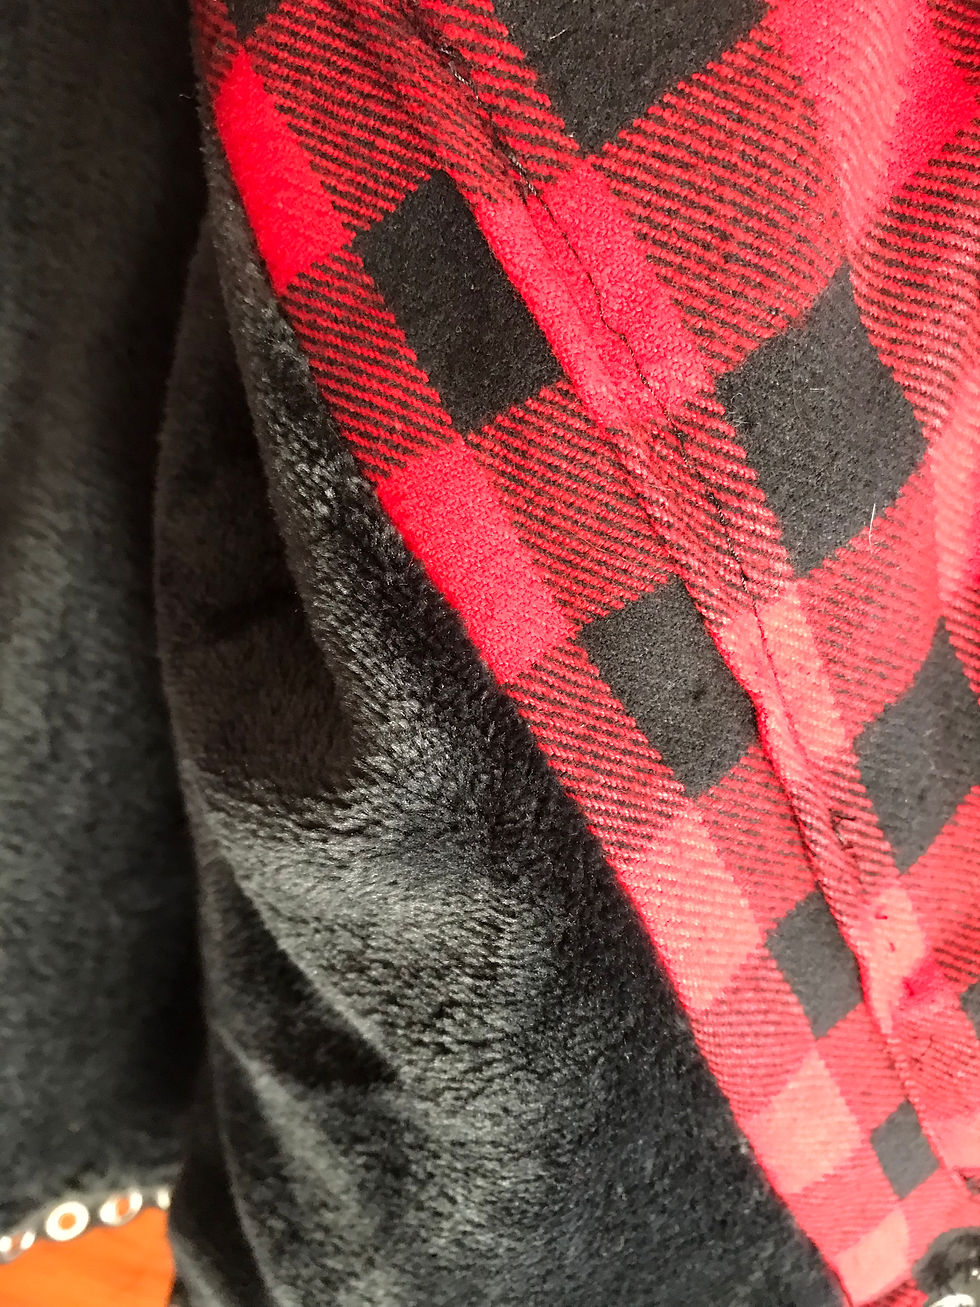
The lining of the cloak is incredibly soft and I love that it is black. My Red Riding Hood character had a red, hooded cloak with a black lining. Though her cloak is designed differently, I love that my cloak has the same color lining as hers. I also enjoy the soft lining. Who wouldn't?
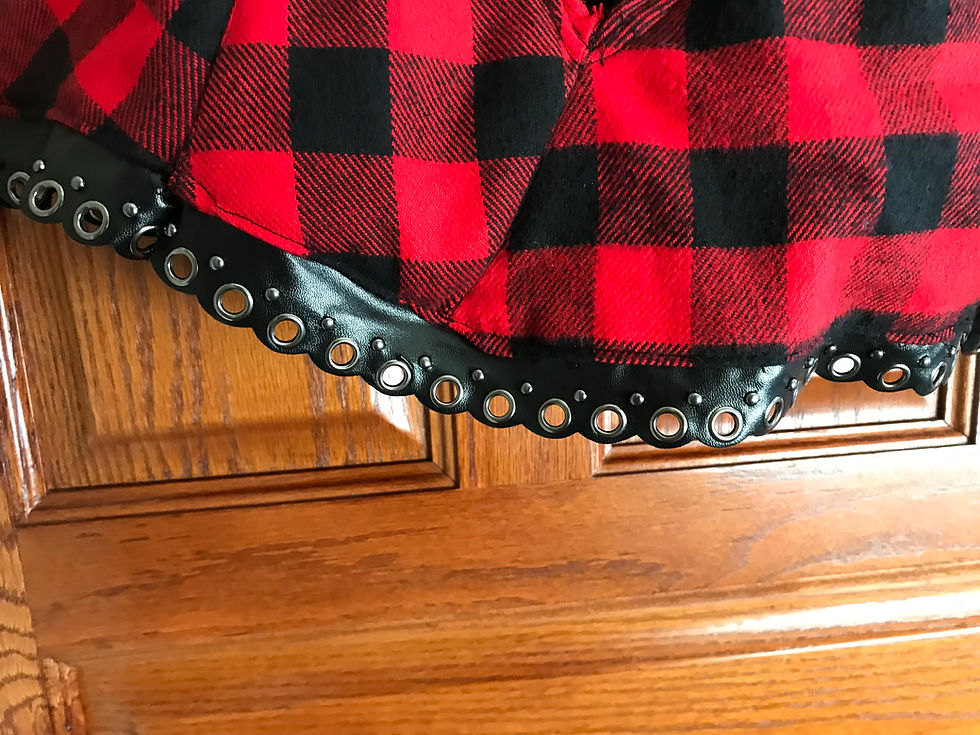
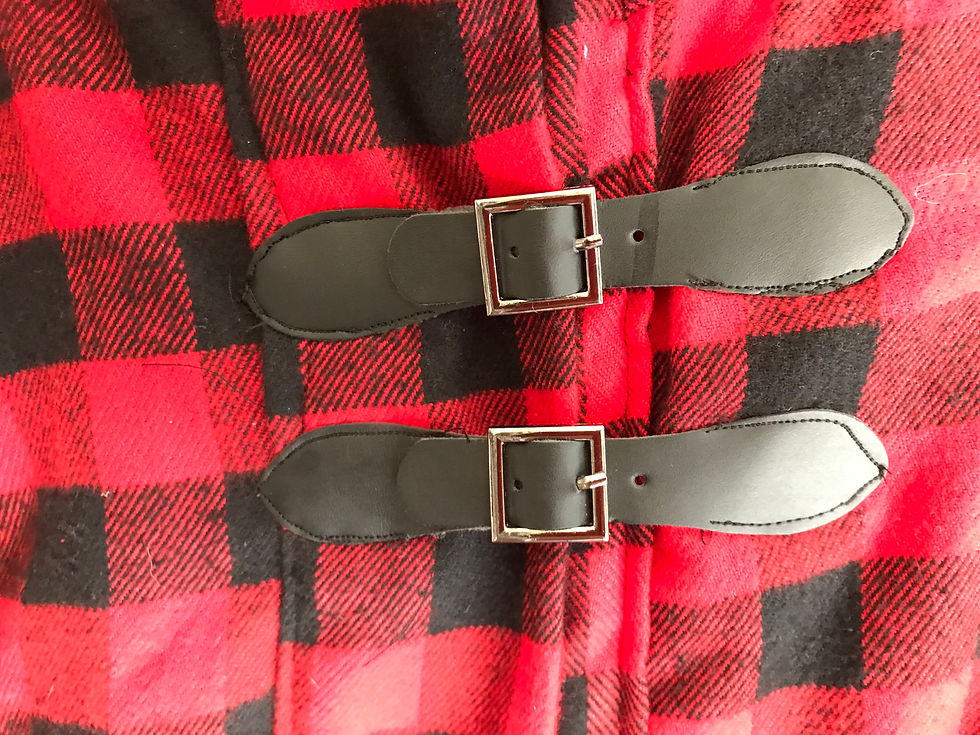
Though I hadn't originally intended to add the trim, the trim actually came out looking wonderful. I love how the leather of the trim plays off the leather of the clasps. Each one compliments the other and each one finishes off the cloak perfectly. They might not have been my original plan but looking back now, I am glad that is how I made the cloak. I would have it no other way!
I really would encourage you to try out this project. It was great fun for me and I love my new fairytale cloak!


Comments